The Secret to Flaky Perfection: Mastering How to Cut In Butter with Ease
Imagine biting into a perfectly flaky pie crust, a tender biscuit, or a scone that practically melts in your mouth. What's the magic behind that irresistible texture? Often, it comes down to a fundamental baking technique that might sound intimidating but is surprisingly simple to master: cutting in butter. If you've ever wondered how to cut in butter easy tips to achieve those dreamy layers, you're in the right place. This guide will demystify the process, revealing the straightforward steps and tools you need to elevate your baking from good to absolutely glorious.
Cutting in butter is more than just mixing ingredients; it's an art that unlocks the full potential of your pastry. It’s the cornerstone of countless beloved baked goods, promising a texture that liquid fats simply cannot replicate. Let's dive into this essential skill and uncover the secrets to perfect flakiness every time.
What Does "Cutting In Butter" Actually Mean? (And Why Cold is Key!)
At its core, "cutting in butter" is the process of incorporating solid, cold butter into dry ingredients, typically flour, in such a way that the butter remains in small, distinct pieces throughout the mixture. Instead of fully blending into a smooth dough, these tiny pockets of butter are crucial for creating the coveted flaky texture in baked goods like pie crusts, biscuits, and scones.
The magic happens in the oven. When these cold butter pieces encounter the heat, they rapidly melt, releasing steam. This steam then pushes apart the layers of dough, creating tiny air pockets and distinct separations. The result? A delicate, multi-layered structure that's tender and light, rather than dense or crumbly. If the butter were warm or fully incorporated, it would mix too thoroughly with the flour, leading to a tougher, less flaky result.
This is why temperature is paramount. Cold butter is non-negotiable. The colder the butter, the longer it takes to melt in the oven, giving off more steam and creating more pronounced layers. Working quickly and efficiently to keep the butter chilled throughout the process is a key how to cut in butter easy tip. For an in-depth look at why this cold temperature is so critical and common pitfalls to avoid, check out our article on Why Cold Butter is Key for Flaky Crusts: Avoid These Mistakes.
Beyond creating steam, cold butter also helps inhibit excessive gluten development in the flour. When butter is warm and fully blended, it lubricates the gluten strands, allowing them to form strong, elastic networks. While great for bread, this is undesirable for tender pastries. By remaining in distinct chunks, cold butter creates barriers, preventing the gluten from over-forming and ensuring a tender, rather than tough, final product.
Essential Tools for Effortless Butter Cutting
You might think you need fancy equipment to master this technique, but many effective tools are likely already in your kitchen. While some methods are faster or more precise, the goal remains the same: incorporating cold butter into flour efficiently while maintaining its temperature and distinct pieces.
1. The Pastry Blender (or Pastry Cutter)
This is arguably the most recommended tool for the job, and for good reason. A pastry blender features several sturdy wire blades or a series of flat metal strips attached to a handle. It's designed to slice through cold butter and blend it into dry ingredients with minimal heat transfer from your hands. Its curved shape allows for easy rocking and chopping motions, making quick work of butter chunks until they reach the desired pea-sized consistency. It's a fantastic investment for any serious baker and makes achieving that coarse crumb texture incredibly easy.
2. Two Butter Knives
No pastry blender? No problem! Two butter knives can serve as an excellent substitute. Hold them together at an angle, like scissor blades, and use a cross-cutting motion to chop and incorporate the butter into the flour. This method requires a bit more effort and might take longer than a pastry blender, but it's very effective. The key is to keep the blades cool and work deliberately to cut the butter rather than smear it.
3. A Fork
Another readily available kitchen utensil, a fork, can also get the job done. Use the tines of the fork to smash and break down the cold butter pieces into the flour. It's best to start with butter already cut into smaller pieces (about ½-inch cubes) to speed up the process. Mash and combine until the butter is evenly distributed in small crumbs. While it might be slower than a pastry blender, it's a perfectly viable option for home bakers.
4. The Food Processor
For speed and convenience, a food processor is an excellent choice, especially for larger batches. Add your dry ingredients and cubed cold butter to the bowl, then pulse in short bursts. The sharp blades quickly chop the butter into fine pieces. The critical how to cut in butter easy tip here is to not overmix. Over-processing can quickly turn your butter into a paste or make the pieces too small, leading to a less flaky result. Pulse just until the desired coarse crumb texture is achieved, usually only a few seconds.
Tools to Avoid (And Why)
- Your Hands: While it might seem intuitive, using your hands is generally discouraged. The warmth from your fingers will quickly melt the cold butter, causing it to soften and blend into the flour rather than remaining in distinct pieces. This can lead to a tough, less flaky pastry.
- A Stand or Hand Mixer: These mixers are designed to thoroughly incorporate ingredients, which is precisely what we want to avoid when cutting in butter. They will quickly overwork the butter, making it too small or even turning it into a paste, resulting in a dense rather than flaky product.
Choosing the right tool can significantly impact your results and ease of effort. For a comprehensive guide on selecting the best tool for your baking needs, check out our article on Cutting in Butter: Choosing the Right Tool for Flaky Results.
Step-by-Step: Your Easy Guide to Cutting In Butter
Ready to put theory into practice? Here's a simple, actionable guide to cutting in butter for perfect pastries every time:
Step 1: Gather and Chill Your Ingredients & Tools
This is perhaps the most crucial preparatory step. Start with butter that is straight from the refrigerator, hard and cold. Some expert bakers even recommend chilling your flour, your mixing bowl, and your chosen tool (pastry blender, knives, or fork) in the freezer for 15-30 minutes before you begin. The colder everything is, the better your chances of achieving superior flakiness. Cut your cold butter into small, ½-inch cubes. This makes it easier for your tool to break down quickly.
Step 2: Combine Dry Ingredients
In your chilled mixing bowl, whisk together your flour, salt, and any other dry ingredients specified in your recipe (like sugar or baking powder/soda). Ensure they are well combined before adding the butter.
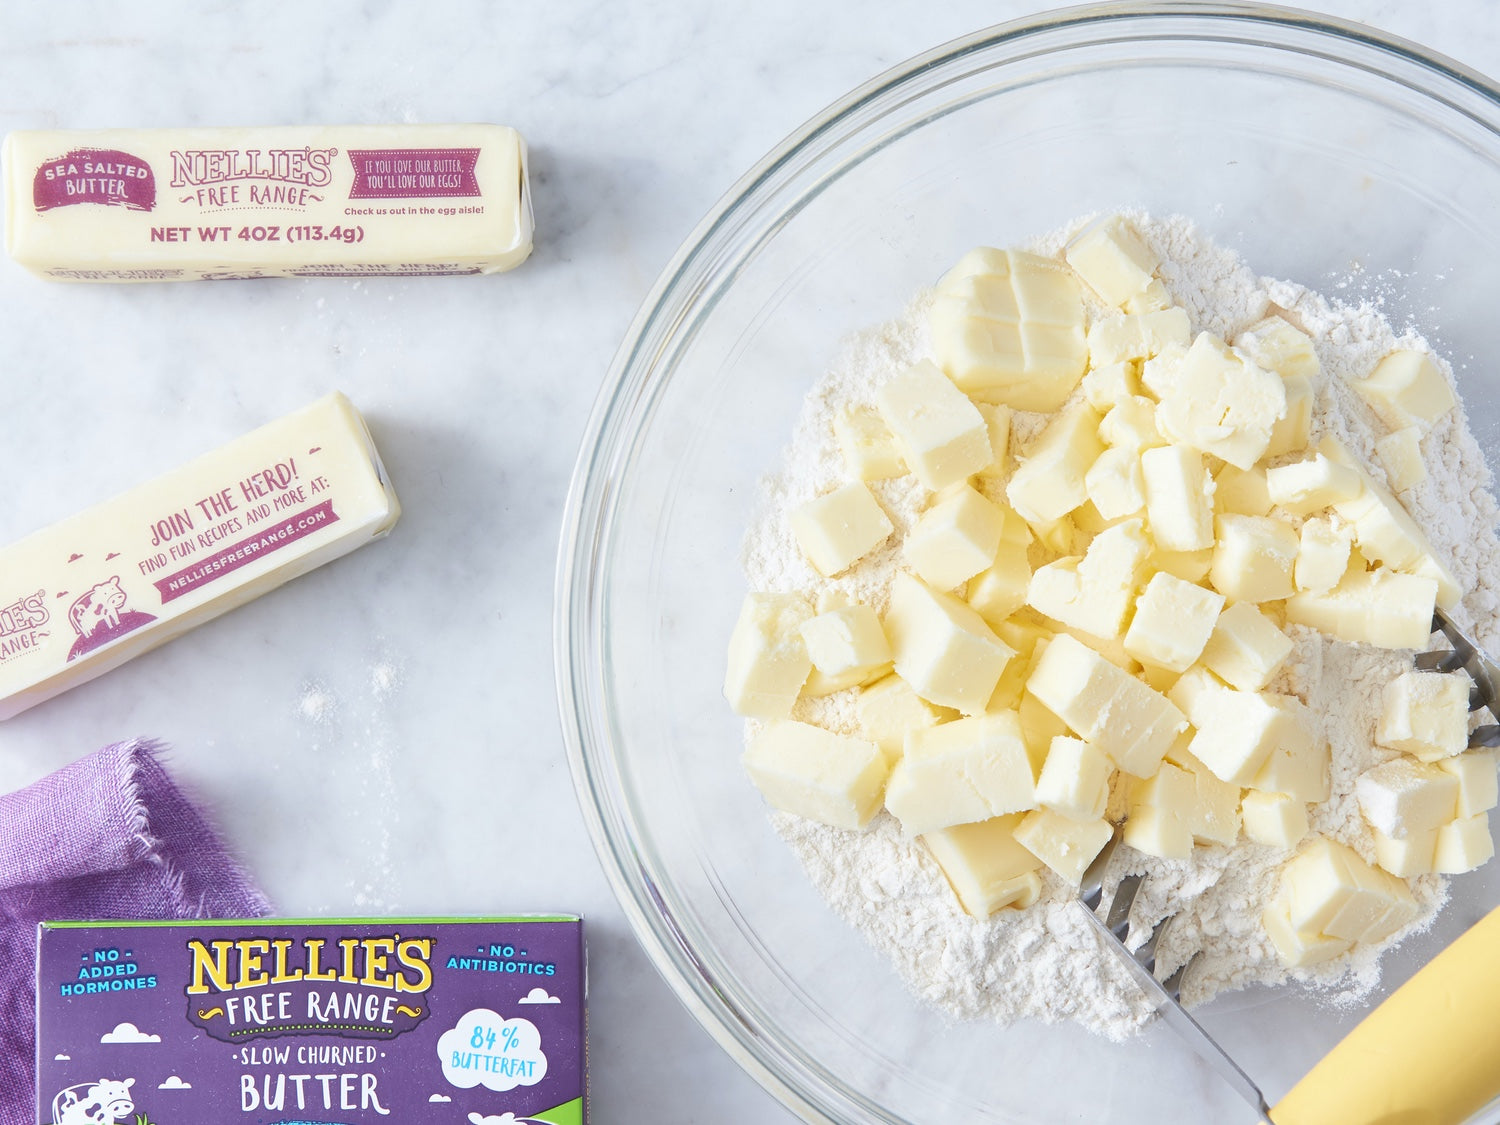
Step 3: Add the Cold Butter
Scatter the cubed cold butter evenly over the dry ingredients. Try to distribute it so no large clumps of butter are sitting on top of each other. This helps with even incorporation.
Step 4: Begin Cutting In
- Using a Pastry Blender: Press the pastry blender down into the mixture, rocking it back and forth and side to side. Lift and repeat, continuously working the butter into the flour. The flour will coat the butter pieces, preventing them from sticking together.
- Using Two Knives: Use a cross-cutting motion to chop the butter into smaller and smaller pieces, incorporating it with the flour as you go. Imagine you're mincing the butter.
- Using a Fork: Press the tines of the fork into the butter cubes, mashing them against the bottom and sides of the bowl. Continually scrape the flour over the butter to coat it.
- Using a Food Processor: Add dry ingredients and butter cubes to the food processor. Pulse in short, 1-2 second bursts until the desired texture is reached. Avoid continuous blending.
Step 5: Aim for the Right Texture
As you work, the butter pieces will gradually get smaller. You're looking for a mixture that resembles coarse crumbs, with some pieces of butter still visible and ranging in size from small peas to tiny lentils. Some might even be as small as oatmeal flakes. The mixture should feel sandy, not wet or paste-like. Stop immediately once you reach this consistency; overworking is the enemy of flakiness.
The entire process should be completed relatively quickly, ideally within 5-10 minutes, to minimize the butter warming up.
Pro Tips for Flaky Success & Avoiding Common Pitfalls
To truly master this technique and consistently achieve outstanding results, keep these expert how to cut in butter easy tips in mind:
- Temperature Control is King: We can't stress this enough. If your kitchen is warm, consider placing your bowl of flour and butter in the refrigerator for a few minutes if you feel the butter softening too much. Some bakers even work over a bowl of ice water for extreme temperature control, though this is usually unnecessary for home kitchens.
- Don't Overmix: This is the most common mistake. It's better to have a few slightly larger pieces of butter than to overwork the mixture into a uniform paste. Overmixing develops gluten, which leads to tough pastries. Stop as soon as you hit that coarse, sandy, pea-sized crumb texture.
- Flour-Coat Everything: Ensure the butter pieces are always coated in flour as you work. This prevents them from clumping together and helps maintain their distinct form, which is vital for flakiness.
- Consider Using a Grater: For an alternative method, particularly if you're struggling with cubes, try grating frozen butter into your flour. This creates very fine strands of butter that are easy to coat with flour and quickly incorporate.
- Practice Makes Perfect: Don't be discouraged if your first attempt isn't flawless. Like any baking skill, cutting in butter improves with practice. Pay attention to the texture and feel of the mixture at each stage, and you'll quickly develop an intuitive sense for when it's just right.
- Use High-Quality Butter: The better the butter, the better the flavor and texture of your final product. European-style butters with higher fat content can sometimes yield even flakier results.
Conclusion
Cutting in butter is a foundational skill that unlocks a world of flaky, tender, and utterly delicious baked goods. From the crispy layers of a homemade pie crust to the airy crumb of a scone, mastering this technique is a game-changer for any baker. By understanding the "why" behind cold butter, choosing the right tools, and following our straightforward steps and how to cut in butter easy tips, you're well on your way to baking perfection.
So, grab your cold butter, select your tool, and get ready to transform simple ingredients into culinary masterpieces. Your perfectly flaky pastries are now just a few simple steps away!
